Showing posts with label sewing. Show all posts

crochet hook use #3167

Pulling out buttonhole elastic that has gotten sucked up inside the waistband of your kids' pants.

IMG_1906

It's the worst- trying to retrieve that pesky stuff if it slips off the button. We have found that a few of our pairs have needed larger buttons installed in order to keep this from happening repeatedly. But when you need to get that elastic out quick so your kid's pants won't fall down, just grab a crochet hook and pull it right out. What a nifty trick!

IMG_1908

lyle's birthday

IMG_9829
We had a nice evening celebrating Lyle's birthday with him on Thursday. We went out to eat (nothing fancy- Chik-fil-A! Everyone likes it and there is a play area, so off we went and I didn't have to cook.) then we came home and opened presents and had cake. He wanted "tiny" cakes but a big cake is easier for all of us, so I made 3 cupcakes in addition to the large cake. So he got to blow out 3 candles on each!

IMG_9826

IMG_9815

IMG_9816

IMG_9817
I was so excited to give him his "I Spy" quilt, and he likes it a lot. Although I think he likes his Lightning McQueen shirt and coloring book more... for now anyways.

IMG_9818
He has enjoyed spreading it out and talking about all the stuff on it, and I'm sure he will come to like having it over him more as the weather cools down. For now it has been quite warm again so even that new shirt he got was making him sweaty. Not blanket weather yet!

Here are some more photos of the quilt- it was a lot of fun to make and it is far from perfect, but I know he will get a lot of use and enjoyment out of it.

IMG_9804
There ended up being 99 squares, and since I made matches of each fabric that left me with one odd one. So I made one with his name to go in the center, and I love it. If I had come out with an even number I probably wouldn't have even thought of that.

IMG_9801
The squares are about 3 1/2 inches across, and the entire quilt measures about 36" x 44". I made the back out of flannel, so it is soft and warm. I machine quilted it by stitching in the ditch, so that there wouldn't be any additional stitching on the front to make it more busy. I bound it with my favorite method of continuous binding, except I machine stitched the last edge instead of hand stitching it, mainly due to time constraints. I am very happy with how it turned out though, especially for a kids quilt that will be on the floor and washed a lot, and I will probably skip the hand stitching in the future more often. Like I said, there is a matching pair of each fabric, so it is like a game as well as a blanket. He has really enjoyed looking at all the designs and searching for the matches. Thank you again to everyone who sent me fabric way back last year- it helped make this quilt even more special and varied!

IMG_9806

soft snail

IMG_8725
I made this for our friend Luke's 8th birthday gift a few weeks ago. He turned out so great that I just had to share him!

IMG_8728
We have so many friends and family that I can't possibly give them all hand made gifts for every occasion that comes up, but when I get a real inspiration I try to just go with it. The snail is one of Luke's favorite creatures, and the idea for this softie came to me one day while we were on the beach at Sandy Creek. I sketched it out on the back of the pattern I was knitting from (yes, I knit while my kids play in the water, and yes, sometimes my knitting gets sand on it) so I wouldn't forget any details, and then just started making it in my head. Does anyone else do this? I turn the idea over and over in my head, piecing things together and figuring all the little steps that need to be done before actually starting to cut any fabric.

He went together almost exactly like I had envisioned, except that his head seemed so bare. So I made him the hat! And then there seemed to be some other small thing missing... so I made him the bowtie! This felt like the perfect stroke of brilliance, since Luke is a very stylish young man who enjoys dressing up and is known to go out on the town sporting a very nice bow tie.

IMG_8729
Ahhh, my labels. I just love using my labels. They make me feel so permanent, like someone a hundred years from now might speak my name as they enjoy using something I have made. That is really cool to think about.

Luke (and his mother) loved the snail very much and at last inquiry I was told that he was given the very appropriate name of "Snaily". I just love watching my creations go to homes where they are so loved and appreciated!

IMG_8726
The blue fabric of the body was something I just had on hand, and all the prints are from that same box of wonderful, vintagey fabric goodness I got from an online friend a while back, and that I used for Lyle's dragon (which, you should know, he has named Willy Dragon and brings to bed with him every night). That stuff is going to show up in project after project and I will be sad when it comes to an end. I love fabric.

fourteen?!

IMG_8514

Somehow I just can't believe my Daisy is fourteen today. It is amazing how quickly that time has passed by us!

IMG_8530

Jason took her out today for a lunch date instead of dinner, because there is an evening event at the library she wants to attend (have I said how awesome our teen program is at the Athens library?) and then she is having a few friends over to celebrate tomorrow night.

Jason & Daisy smile

Jason & Daisy

In these pictures she is sporting my newest creation and birthday gift to her, a skirt made from neckties. She is completely in love with it and I am sure she will wear it often. It looks great on her and twirls out to a full circle- and who doesn't love wearing something that twirly?

IMG_8538

Daisy with her tie skirt spread out

Daisy

I am so proud of the young lady Daisy is becoming- she is trustworthy, helpful, and honest, and is still very much my sweet little girl even as she heads towards becoming a woman. I enjoy very much the time I get to spend with her and love watching her try out her wings as she gains more and more independence. She is an awesome daughter, sister, and friend- a person I am thankful to have in my life. I love you, Daisy girl. Happy birthday!!

IMG_8534

stuffed dragon

IMG_7644

The other day Lyle had one of Stella's dolls and didn't want to give it back. I felt bad because I haven't made him anything like that, even though I have meant to. So I asked him if he wanted me to make him a dolly or a sock monkey- since I knew I had socks on hand to make him one. He paused for a moment, looked at me and said, "No, a dragon." (?!) So I told him I would and he went off to play.

IMG_7639

After I got him in bed I got to work, and came up with this little guy. He is my own design, inspired mainly by the dragon in one of Lyle's favorite books, There's No Such Thing as a Dragon, by Jack Kent.

IMG_7640

Lyle loved him right away, although he noticed right off that this dragon had no wings, and he thinks that needs fixing. So I'll add those soon. Of course I didn't take pictures right away, so by the time I got around to it the dragon had already gotten chocolate milk spilled on him, but I'm sure he will get plenty dirty in the process of being well loved by Lyle.

IMG_7642

The green fabric was something I had on hand and don't remember where I got, the stripes along the belly was given to me by Jason's sister (I think?) and the vintage-y prints down the spine were in a wonderful fabric package I received from an online friend. There are many more where those came from and they will be popping up in projects for years to come, I am sure.

IMG_7645

hammocks, part two

IMG_7435

We had to go buy some stronger rope, but we used some fabric we already had to make this full sized addition to our growing collection of urban hammocks.

IMG_7437

We used the full 50 feet of rope that came in the package, leaving it nice and long on both ends to accommodate wrapping around large trees or across larger distances. We also made sure to get some rated at over 200 lb. so that it would hold an adult without fear of falling!

IMG_7489

We tried it out in the front yard with some trees and it worked great, but our favorite location is on the deck out back. When the kids sit in it sideways it works like a porch swing! We all love it and I know I will have to make more soon because there is always a fight over who gets to sit in it. I managed to get a wonderful 20 minute nap out there today and it was really comfortable and relaxing.

kids legs in hammock

If you haven't tried this out yet- go get some rope and do it! A really great beginning sewing project.

stella & hazel

urban hammocks

Today we decided to use some of our newly freed-up non-TV time to make our first Urban Hammock. We will most likely be using these around our own yard or while camping, but we might bring them out to the park or something too. Probably not too much downtown use like in the video, but you never know.


IMG_7405

Stella and Lyle were the only ones light enough for the rope we had on hand, and short enough for the fabric piece we chose to use. We hung it in a corner of our deck because the rope we had was fairly short and would not go around any of the trees in our yard.

IMG_7407

IMG_7414

They had a blast trying all sorts of positions, and both of them loved being rocked in the hammock. Stella begged to sleep in it tonight, but since it will be under 50 degrees out there tonight AND she has never slept outside alone, we vetoed that idea pretty quick. If there were a way to hang it up in her room though, she would probably sleep very comfortably in it.

IMG_7425

IMG_7421

The second, larger hammock is already sewn and waiting for some rope, which we will go and buy tomorrow. This one is long enough for Daisy or Hazel, and I'm sure will not be the last one we will make. Hammocks for everyone!!

IMG_7404

IMG_7400

busy

Yesterday I was busy fighting with and cursing at my old, tired, piece of junk sewing machine.

IMG_5879

Today I am busy getting to know my new best friend, who came home with me in the (slightly crumpled) box above. I got an excellent deal on a used machine, but with warranty and all the perks of a new machine- like a free cleaning and the capability of trading up within a year to a better model. I am over the moon about it! This means no more jumping through hoops to get my machine to do basic things, and some new great features and shortcuts to save me time.

I think I am going to love being a Husqvarna owner. ::sigh::

smock

IMG_5674

I finished this smock for Stella today and it turned out so cute I had to share. This is the prototype for a project a friend asked me to do for her- she had one already that was in tatters and wanted me to copy it and make her girls some new ones for the holidays.

IMG_5675

So I took the old one apart and remade it with new fabrics. Now that I have the measurements and instructions down, the new ones for my friend will be quick and easy! And Stella got a great smock out of the deal too. It is really great- with no ties and large arm holes- easy for her to put on by herself.

IMG_5677

Now she can help me in the kitchen and stay clean when she wipes her hands on her front and legs. Let the baking begin!

plans

front entrance to sun room

This is our sun room. It used to be a car port from what we can tell, so it comes off the kitchen on the side of our house, with one door facing the street and another going out to our deck along the side and back of the house.

sun room from kitchen door

I've always wanted to be able work from home, and I've always wanted to have more time to sew and make things to sell. So we decided to try to make this happen.

sun room from front corner

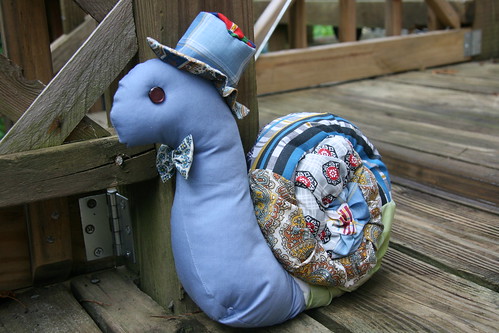
I've settled on alterations and clothing repair, and custom sewing (like sewing from a pattern with customer-specified fabric, etc.) And then if time allows, I might make some small items to put up in an Etsy shop or sell at craft fairs, etc.

sun room from back corner

This room is so perfect for my plan. It is where I was planning to have my sewing machines and work space set up, anyway. But it is perfect for an alterations shop because it has a separate, front entrance- so when people come in they will not have to step over toys and fight off our attack dog- and it also has a closet large enough to be a fitting room. So once I am set up, I'll be able to schedule appointments in the evening when Jason is home, and my customers can come in and have a fitting for an alteration or sit down and chat about a custom project.

door and window into kitchen

Aside from appointments, I am going to be setting aside at least 10-12 hours per week in order to work uninterrupted. This equates to 2 evenings after dinner and one weekend afternoon, where Jason will have the kids and I will be able to stay confined to my room and focus. To work for hours at a time without having to stop and change diapers, prepare food, clean up messes, and all the other things that keep me from being able to be productive.

sun room closet, will be fitting room

So, now that my Halloween sewing is past, I am settling in to really focus on this dream. There is a lot of work to be done to turn our junky sun room into My Studio. But I've already started taking a few alterations and have 2 different custom sewing projects underway, so I feel confident that I'll be able to have steady work. The coming week or two I plan to work on making the space more cozy and clearing out some of the stuff that belongs elsewhere, as well as completing the projects I have in process. I think by the first of the year I'll be able to be in full swing and really advertising my services by word of mouth around town. I'm sure things will change and evolve quite a bit as I work through the process of getting set up and seeing what people want. I'll post pictures as the space develops! Thank you so much to everyone who has already been so incredibly supportive to me in this endeavor. It has been a long time coming and I feel it all falling into place now so nicely.

sun room from closet side